Installation Instructions#
Supported Configurations#
The Ryzen AI Software supports the AMD Ryzen™ 7940HS, 7840HS, 7640HS, 7840U and 7640U processors running Windows 11.
Note
In this documentation, “NPU” is used in descriptions, while “IPU” is retained in the tool’s language, code, screenshots, and commands. This intentional distinction aligns with existing tool references and does not affect functionality. Avoid making replacements in the code.
Prepare the System#
Download the :download:` NPU Driver <https://account.amd.com/en/forms/downloads/ryzen-ai-software-platform-xef.html?filename=ipu_stack_rel_silicon_prod.zip>` and install it by following these steps:
Extract the downloaded zip file.
Open a terminal in administrator mode and execute the
.\amd_install_kipudrv.batbat file.
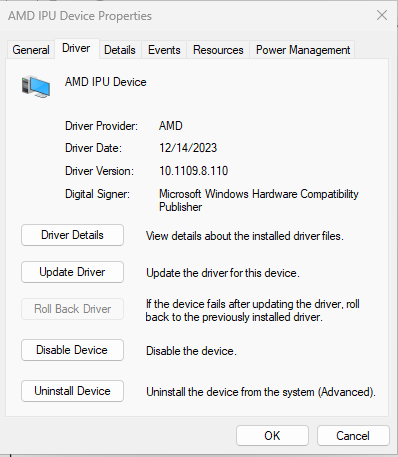
Ensure that the NPU driver is installed from Device Manager -> System Devices -> AMD IPU Device as shown in the following image.
To enable the development and deployment of applications leveraging the NPU, you must have the following software installed on the system.
Dependencies |
Version Requirement |
|---|---|
Visual Studio |
2019 |
cmake |
version >= 3.26 |
python |
version >= 3.9 |
Anaconda or Miniconda |
Latest version |
Install the Ryzen AI Software#
Before installing the Ryzen AI Software, ensure that all the prerequisites outlined previously have been met and that the Windows PATH variable is properly set for each component. For example, Anaconda requires following paths to be set in the PATH variable path\to\anaconda3\, path\to\anaconda3\Scripts\, path\to\anaconda3\Lib\bin\. The PATH variable should be set through the Environment Variables window of the System Properties.
Download the ryzen-ai-sw-1.0.1.zip Ryzen AI Software installation package and extract it.
Open an Anaconda or Windows command prompt in the extracted folder and run the installation script as shown below. Make sure to enter “Y” when prompted to accept the EULA.
.\install.bat
The install.bat script does the following:
Creates a conda environment
Installs the Vitis AI Quantizer for ONNX
Installs the ONNX Runtime
Installs the Vitis AI Execution Provider
Configures the environment to use the throughput profile of the NPU
Prints the name of the conda environment before exiting
The default Ryzen AI Software packages are now installed in the conda environment created by the installer. You can start using the Ryzen AI Software by activating the conda environment created by the installer (the name of the environment is printed during the installation process).
IMPORTANT: The Ryzen AI Software installation folder (where the zip file was extracted) contains various files required at runtime by the inference session. These files include the NPU binaries (*.xclbin) and the default runtime configuration file (vaip_config.json) for the Vitis AI Execution Provider. Because of this, the installation folder should not be deleted and should be kept in a convenient location. Refer to the Runtime Setup page for more details about setting up the environment before running an inference session on the NPU.
Customizing the Installation
To specify the name of the conda work environment created by the installer, run the script as follows:
.\install.bat -env <env name>
Instead of the automated installation process, you can install each component manually by following the instructions on the Manual Installation page.
To use your existing conda environment with the Ryzen AI software, follow the Manual Installation instructions and manually install the Vitis AI ONNX Quantizer, the ONNX Runtime, and the Vitis AI Execution Provider, without creating a new conda environment.
If you need to install the Vitis AI PyTorch/TensorFlow Quantizer or the Microsoft Olive Quantizer, refer to the Other Quantizers page.
Test the Installation#
The ryzen-ai-sw-1.0.1 package contains a test to verify that the Ryzen AI software is correctly installed. This installation test can be found in the quicktest folder.
Activate the conda environment:
conda activate <env_name>
Run the test:
cd ryzen-ai-sw-1.0.1\ryzen-ai-sw-1.0.1\quicktest
curl https://www.cs.toronto.edu/~kriz/cifar-10-sample/bird6.png --output image_0.png
python -m pip install -r requirements.txt
python quicktest.py --ep ipu
The test runs image classification on the NPU. On a successful run, you will see an output similar to the one shown below:
I20231127 16:29:15.010130 13892 vitisai_compile_model.cpp:336] Vitis AI EP Load ONNX Model Success
I20231127 16:29:15.010130 13892 vitisai_compile_model.cpp:337] Graph Input Node Name/Shape (1)
I20231127 16:29:15.010130 13892 vitisai_compile_model.cpp:341]   input : [-1x3x32x32]
I20231127 16:29:15.010130 13892 vitisai_compile_model.cpp:347] Graph Output Node Name/Shape (1)
I20231127 16:29:15.010130 13892 vitisai_compile_model.cpp:351]   output : [-1x10]
I20231127 16:29:15.010130 13892 vitisai_compile_model.cpp:226] use cache key quickstart_modelcachekey
[Vitis AI EP] No. of Operators :   CPU     2    IPU   400  99.50%
[Vitis AI EP] No. of Subgraphs :   CPU     1    IPU     1 Actually running on IPU     1
....